
Post Date: May 09, 2022
Last Updated: November 02, 2026
Introduction
The connection refused on Ubuntu 18.04 error can occur when the NRPE daemon is not running or the remote server is not listening on TCP port 5666. Identifying the cause is the first step toward restoring Nagios monitoring connectivity.
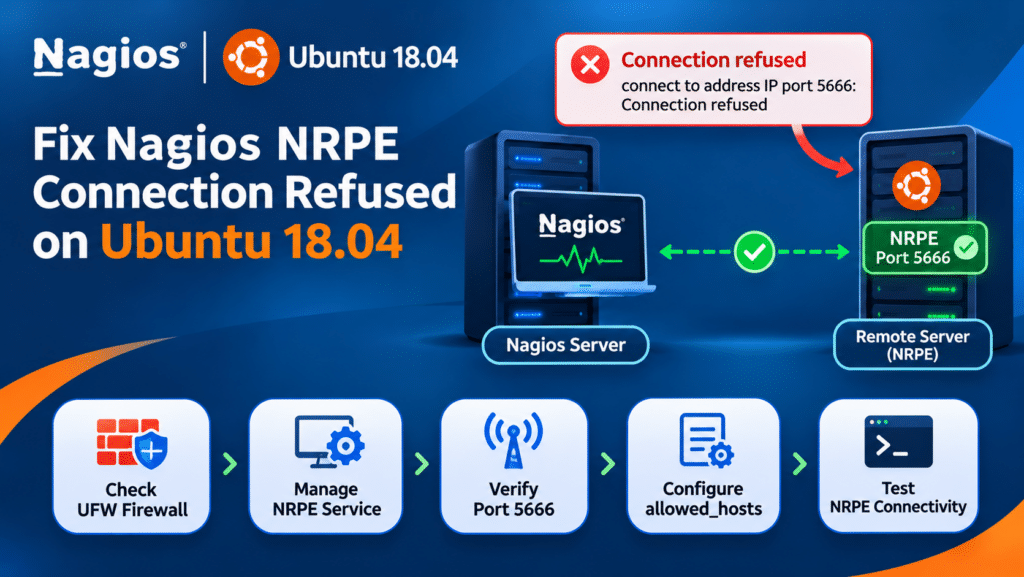
(No output on stdout) stderr: connect to address IP port 5666: Connection refused
This error generally indicates that the remote server is not accepting connections on port 5666. Possible causes include the NRPE service being stopped, the NRPE daemon not listening on the required port, or firewall rules blocking the connection.
In this guide, we will explain how to troubleshoot the Nagios NRPE connection refused error on Ubuntu 18.04 by checking the firewall, verifying the NRPE service, configuring access permissions, and testing connectivity.
For additional information, refer to the official Nagios NRPE installation documentation.
Prerequisites
Before troubleshooting the connection refused error on Ubuntu 18.04, ensure that you have:
- A remote server running Ubuntu 18.04.
- A user account with sudo privileges.
- Nagios monitoring configured on the monitoring server.
- NRPE installed on the remote server.
- The IP address of the Nagios monitoring server.
Implementation
Follow the steps below to troubleshoot the Nagios NRPE connection refused error and restore communication between the Nagios monitoring server and the remote Ubuntu server.
Step 1: Connect to the Remote Server
First, connect to the remote Ubuntu server where NRPE is installed using SSH.
ssh user@REMOTE_SERVER_IP
Replace user with your server username and REMOTE_SERVER_IP with the remote server’s IP address.
Step 2: Check the UFW Firewall Status
Check whether the UFW firewall is active on the remote server by executing:
sudo ufw status
If the firewall is inactive, you can proceed to the NRPE service checks.
If UFW is active, verify whether TCP port 5666 is allowed.
Before enabling UFW on a server where it is currently inactive, ensure that SSH access is permitted to avoid locking yourself out:
sudo ufw allow OpenSSH
Enable UFW only if you intend to use it and have reviewed the existing firewall requirements:
sudo ufw enable
Step 3: Allow NRPE Port 5666 Through UFW
NRPE uses TCP port 5666 for communication between the Nagios monitoring server and the remote server.
To allow connections from a specific Nagios server IP address, execute:
sudo ufw allow from NAGIOS_SERVER_IP to any port 5666 proto tcp
Replace NAGIOS_SERVER_IP with the actual IP address of your Nagios monitoring server.
For example:
sudo ufw allow from 192.168.1.100 to any port 5666 proto tcp
Check the firewall rules after adding the permission:
sudo ufw status numbered
Restricting access to the Nagios monitoring server IP is preferable to allowing port 5666 from all IP addresses.
Configuring the firewall correctly is an important step in resolving the connection refused on Ubuntu 18.04 error. Make sure the Nagios monitoring server is allowed to communicate with the remote server through TCP port 5666.
Step 4: Check the NRPE Service Status
If the firewall is configured correctly, check whether the NRPE service is running.
On Ubuntu systems installed through the NRPE package, the service may be named nagios-nrpe-server. If NRPE was installed from source, the service may instead be named nrpe.
Check the service status using the appropriate service name:
sudo systemctl status nagios-nrpe-server
If your installation uses the nrpe service, run:
sudo systemctl status nrpe
If the service is inactive or stopped, start it using the matching service name:
sudo systemctl start nagios-nrpe-server
Enable the service to start automatically after a reboot:
sudo systemctl enable nagios-nrpe-server
For a source-based installation, use nrpe.service instead.
If the NRPE service is stopped or inactive, starting it may resolve the connection refused on Ubuntu 18.04 issue. Verify that the service is active before testing the connection from the Nagios monitoring server.
Step 5: Verify Whether NRPE Is Listening on Port 5666
Even if the NRPE service is running, verify that it is listening on the expected TCP port.
Execute:
sudo ss -lntp | grep 5666
Alternatively, use:
sudo netstat -plnt | grep 5666
If NRPE is listening correctly, the output should show a listening socket on port 5666.
If there is no output, check the NRPE service status and configuration. Also verify that the daemon is configured to listen on the correct address and port.
Step 6: Check the NRPE Configuration
Open the NRPE configuration file:
sudo nano /etc/nagios/nrpe.cfg
If NRPE was installed from source, the configuration file may be located at:
/usr/local/nagios/etc/nrpe.cfg
Locate the allowed_hosts directive:
allowed_hosts=127.0.0.1,192.168.1.100
Replace 192.168.1.100 with the actual IP address of your Nagios monitoring server.
This setting restricts which hosts can connect to the NRPE daemon.
Save the configuration file and restart the appropriate NRPE service:
sudo systemctl restart nagios-nrpe-server
For source-based installations, restart nrpe.service instead.
Step 7: Test NRPE Connectivity
After configuring the firewall and restarting NRPE, test the connection locally on the remote server:
/usr/lib/nagios/plugins/check_nrpe -H 127.0.0.1
The plugin path may differ depending on how NRPE was installed. Source-based installations commonly use:
/usr/local/nagios/libexec/check_nrpe -H 127.0.0.1
If the local test succeeds, execute the check from the Nagios monitoring server:
/usr/lib/nagios/plugins/check_nrpe -H REMOTE_SERVER_IP
Replace REMOTE_SERVER_IP with the remote server’s IP address.
A successful response should display the NRPE version, for example:
NRPE v4.1.0
If the connection still fails, check the remote server’s firewall, network connectivity, NRPE listening address, and allowed_hosts configuration.
Conclusion
The Nagios NRPE connection refused error on Ubuntu 18.04 can occur when the NRPE service is stopped, port 5666 is not listening, or firewall and access configurations prevent communication.
By checking UFW rules, verifying the NRPE service, configuring the allowed_hosts directive, and testing connectivity from the Nagios server, you can identify and resolve the issue.
These troubleshooting steps help restore communication between the Nagios monitoring server and remote Linux systems.
Note: Ubuntu 18.04 reached the end of standard security maintenance in May 2023. Consider upgrading to a supported Ubuntu release or ensuring appropriate Ubuntu Pro coverage for systems that must continue running Ubuntu 18.04.
Frequently Asked Questions
1. What does connection refused on port 5666 mean in Nagios?
It generally means the Nagios server cannot establish a TCP connection to the NRPE daemon on the remote server. The service may be stopped, not listening on port 5666, or blocked by a firewall.
2. Why is NRPE not listening on port 5666?
NRPE may not be running, may have an incorrect configuration, or may be configured to listen on a different address or port. Check the service status and use ss -lntp to verify the listening socket.
3. How do I allow port 5666 in Ubuntu UFW?
Use the following command to allow connections only from the Nagios monitoring server:
sudo ufw allow from NAGIOS_SERVER_IP to any port 5666 proto tcp
Replace NAGIOS_SERVER_IP with your monitoring server’s IP address.
4. How do I restart the NRPE service in Ubuntu?
For package-based installations, execute:
sudo systemctl restart nagios-nrpe-server
For source-based installations, the service may be named nrpe.
5. How do I test NRPE connectivity from the Nagios server?
Run the following command from the Nagios monitoring server:
/usr/lib/nagios/plugins/check_nrpe -H REMOTE_SERVER_IP
A successful connection should return the NRPE version.
6. What is the default NRPE port?
The default NRPE communication port is TCP 5666. Ensure that the NRPE daemon is listening on this port and that the required firewall rules permit connections from the Nagios monitoring server.
7. Does enabling UFW automatically resolve the NRPE connection refused error?
No. Enabling UFW alone does not resolve the issue. You must configure the appropriate firewall rule, ensure NRPE is running, and verify that it is listening on port 5666.
Related Article
How to set up the website monitoring on Nagios?
How to Set Up CPU Utilization Monitoring in Nagios with Percentage-Based Thresholds
Talk to Our Technology Experts
Getting Nagios alerts or connection errors on your servers? Our team can help you set up monitoring, configure firewalls and NRPE, and keep your infrastructure running reliably with our DevOps and Cloud Services.